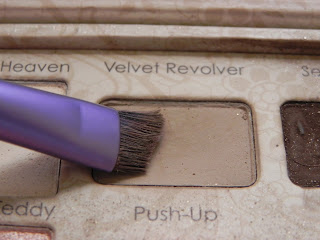
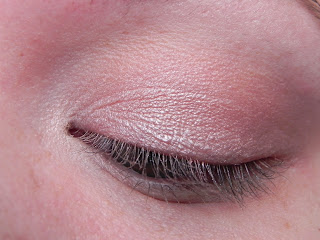
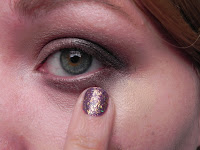
The biggest date night of the year is coming up next week, and I thought it would be fun to do a look that I might would wear for Valentine's Day.
(I am trying to show my technique and how I use my brushes better through pictures. Please let me know if this helped!)
Continue reading to see how I got this look:
To get started I moisturized my face, applied a primer, and got plucked all of the stray hairs around my eyebrows.
I used my Revlon ColorStay Whipped Cream foundation with a sponge, because I wanted a flawless finish to my skin!
This is my face after the foundation. It covers redness and blemishes very well. I like to start with foundation when using this product, so that it has time to set into my skin and I can touch up the areas that need concealer after I have finished my eyes.
After foundation I like to do my brows. This gives you a framework for working with eyeshadows. I start with the spool and brush my eyebrows into my desired shape.
This shade from my Too Faced Natural Eyes Palette is the perfect shade for my brows. Use a shade that suits your hair color and skin tone.
I like to define the bottom of my brows with the color. Then I fill in the arch and the "tail" of my brows. To finish out the shape I run the color through the rest of my brows to fill in any sparse areas. I then use a clear gel to set them in place.
After my brows the redness that applying my foundation sometimes causes, has usually calmed down. So I go back to conceal any blemishes that still remain. This is the Kat Von D concealer in light. I don't particularly love this, but I have it and it works. So i just squeeze out a small amount onto my finger.
Then I dot that small amount on any spots that I want to cover up.
Using my fingers I gently tap the area with my finger until it blends into my skin. Then I go over the areas with my sponge to insure that it is well blended.
This is the finial result of the concealer.
I start every eye look with a primer. This is my favorite primer. It does not crease and it lasts all day. I just use my fingers to blend this all over my lid.
The Maybelline Color Tattoos are my favorite color bases. This one in Inked in Pink is beautiful and I use my fingers to blend this all over my eyelid and a little into the crease.
To enhance my highlighted areas I used the NYX Jumbo Eyeshadow Pencil in Milk. I just draw it on my inner corner and my brow bone.
Using a finger works best for working this into the skin. It warms it up and helps it go exactly where I want it to go.
This is what my eye looks like after everything is blended.
For this look I am going to be using the Silent Treatment Palette from Wet 'n Wild. These trios sell for $2.99 at Walgreens. They are amazing eyeshadows, especially for the price. They have a great texture, pigmentation, and they last all day.
Apply the lightest color over Milk.
Using the same small brush and the same color, apply the shadow over the inner half of your eye lid.
This is what your eye should look like.
Apply the color labeled "eyelid" to the outer half of the your eyelid.
Using the top of the brush bring some of the "eyelid" color into your crease and blend it out softly.
To smooth the edges out, use a large blending brush. You do not want any harsh edges.
You should have something similar to this.
Use what ever creamy eyeliner you have and apply it in the outer corner of your eye. Create a "V" shape with your lash line and your crease.
Use a small smudger brush to get the eyeliner in the correct shape. Just smooth in out in a more defined "V" shape.
Using a sperate crease brush apply the "crease" color over where you applied the eyeliner.
A crease brush will have thinner side and a wider side, because of how they are made. Use the thinner side to get the color into your crease area.
Then you turn the brush to the wider side to easily blend the color out in you crease.
Using the first crease brush, with no additional color, blend the crease out a little more.
Apply the first, lightest color, in the center of the lid to keep that area bright.
This is how it will hopefully look when its all blended.
Mix the "crease" and "eyelid" color on the second crease brush.
Gently apply that color to your lower lash line.
Blend the color out, so there is not a harsh line just a smokey effect.
The Maybelline Age Rewind is my favorite concealer for under my eyes. I apply it in the triangle shape I showed in my under eye concealing post.
Blend the concealer in with your ring finer, because it is the most gentle and the warmth from your fingers will help it blend into the skin.
This step cleans up the shape of your eyeshadow and conceals your under eye circles at the same time.
Using the same eyeliner from earlier, apply a small amount along your lash line.
Smooth the eyeliner into your lash line with an angled brush.
Run the first crease brush you used over the liner to give it a less harsh look.
Here is the final eye look before mascara.
Give your lashes a good curl and apply your favorite mascara.
This is the final eye look.
Contour with your favorite bronzer. I love Nars Laguna.
I like to apply in a "3" shape, along the side of my forehead, under my cheekbones, and under my jawline.
Next I apply my highlighter of choice. This is a sample I have of the Benefit Watts Up.
Apply highlighter along the tops of your cheekbones.
I like to blend this product in with my fingers.
It gives a nice glow to the skin.
I also apply this to the bridge of my nose, my cupid's bow, and in the center of my lower lip. Remember to blend it.
Apply a blush on the apples of your cheeks. This is a Stilla blush I picked up from Ulta. I thought it was festive! I just swirl my brush in all four colors and apply.
This is the final cheek look.
I applied this lip primer before any other lip products to help the products sit better on my lips.
I first applied MAC's Creme D'Nude
To top it off I used MAC's Kiss & Don't Tell.
Here is the final look:
I hope you enjoyed this and might give it a try for you next night out! Let me know what you think in the comments below. If you have anything you would like to see next leave that below too! -Jessica


OMG! I love that blush on you!!
ReplyDelete